My pimp-sista Jessica asked me if I have a tutorial for the notepad booklet I had done recently. I promised her to do one.. so here's my first try on a crafty tutorial ... I hope someone find it helpful and it's easy to follow.
If you have any question about it, don't hesitate to ask me!!! :)
Ok.. let's get started:
The supplies we will need:
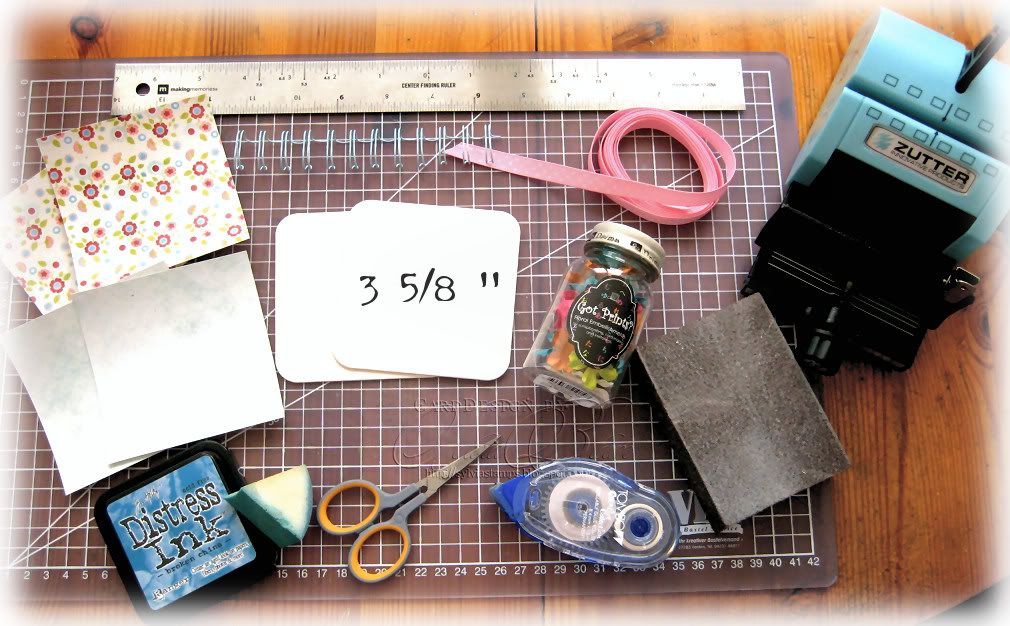
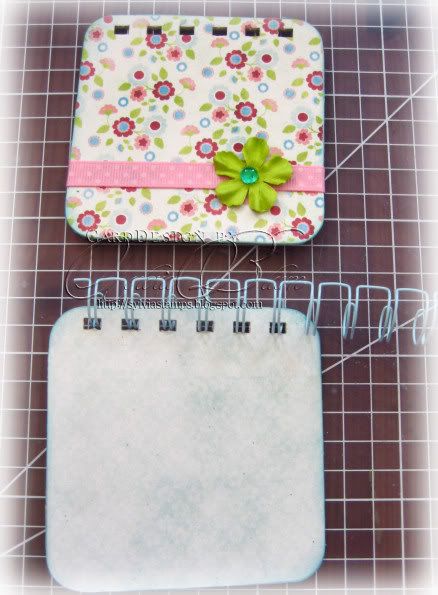
- 2 coasters (approx. 3 5/8 inch square)
- 2 different patterned papers 2 pieces of each pattern (=4 pieces of patternd paper) cut slightly larger than the coasters (I used papers from the May Grab at TDC designed by Amy Sumrall - not available at the moment)
- Zutter Bind-It-All
- binding wire (o-wire)
- sanding block
- glue (I used the Tombow glue roller, but double sided tape or any other glue will work, too)
- optional:
- some ink to ink the edges (Distress Broken China)
- some embellishments (like ribbon(Poppicrafts), flowers (Prima), brads e.g.)
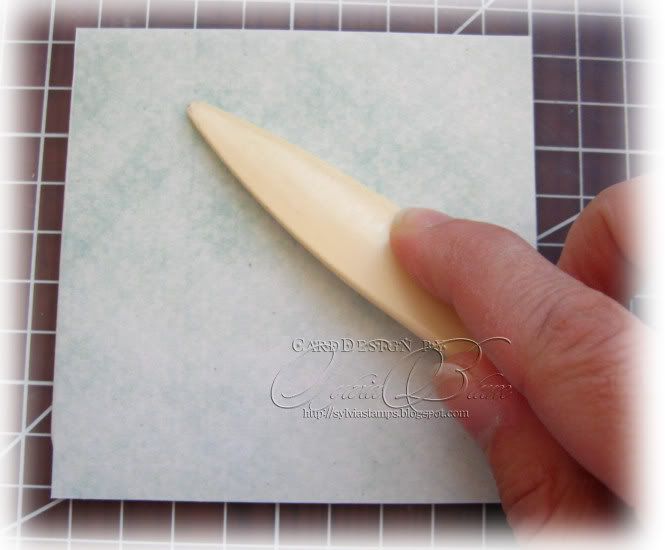
Ok... onto step 1:
glue down one of the papers (I always begin with the inside) onto one coaster side and burnish it
step 2:
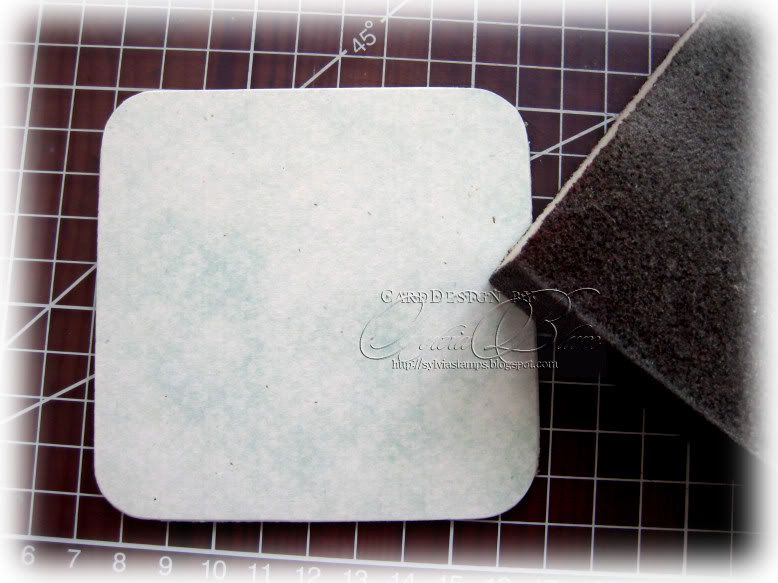
cut the overlapping edges (as shown on the photo below)
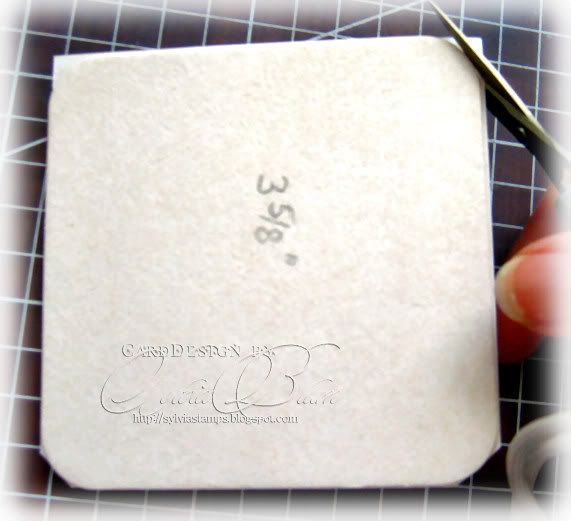
this is what it looks after cutting three edges (one edge left to cut):
step 3:
sand all around the edges
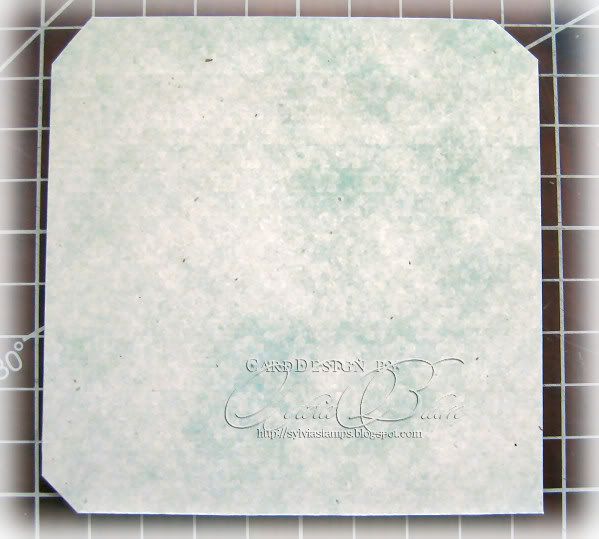
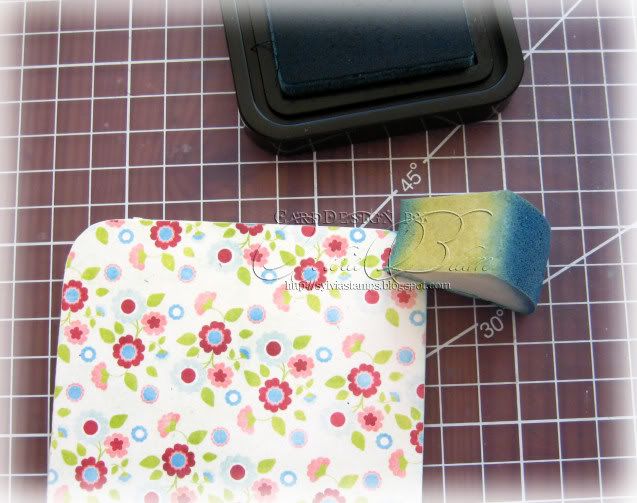
step 4 (optional):
ink the edges using a sponge (or leave it as is.. it's just that I have a thing with inking all edges *lol*)
step 5:
do the same with the opposite site (I used different papers for inside and outside, but you could use all the same papers if you like to):

step 6:
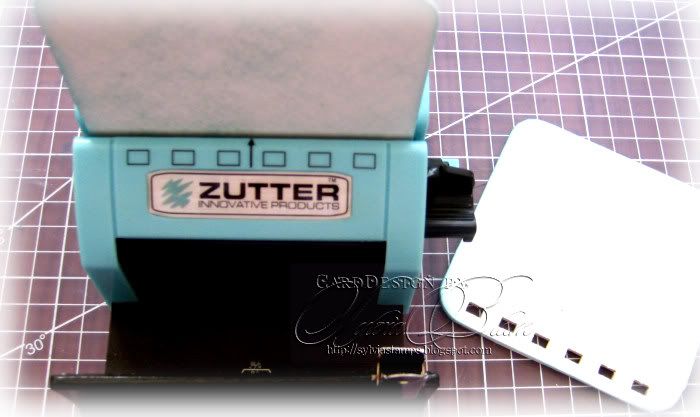
place the covered coaster into the Bind-It-All (upside down), center them and punch the holes (do this with both coasters)
step 7:
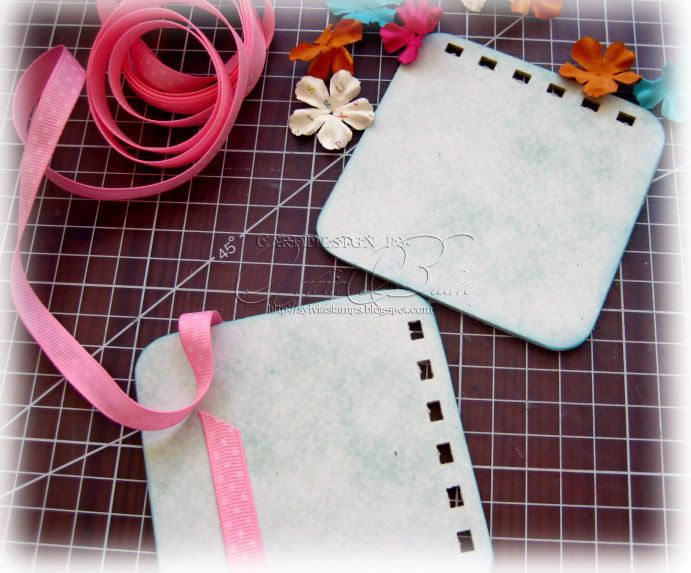
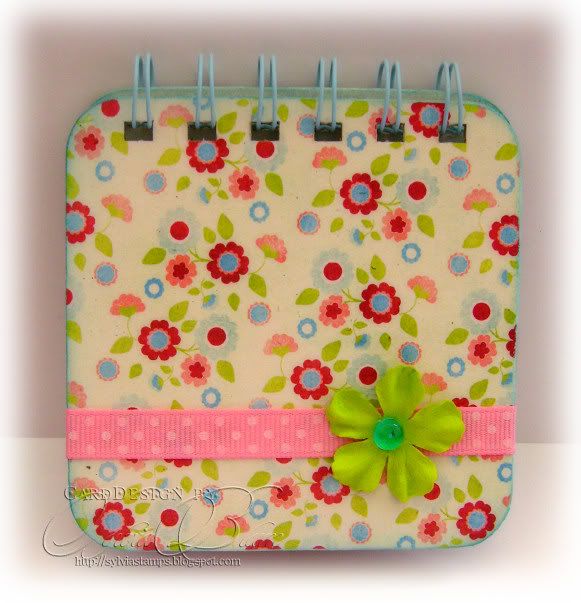
now you can embellish your coasters as you like.. I used some ribbon, paper flowers and dew drops here in this example
step 8:
now lay the two coasters on top of each other - you have to flip the front side and lay it under the back side to bind it, so you will have the 'seam' (where the open wire ends meet when they are punched together) in the inside when you are finished
step 9:
put both coasters with the o-wire upside down into the Bind-It-All and push
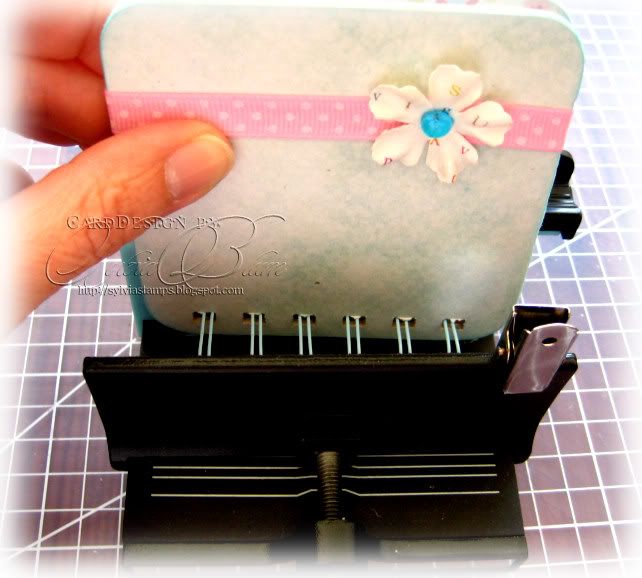
step 10:
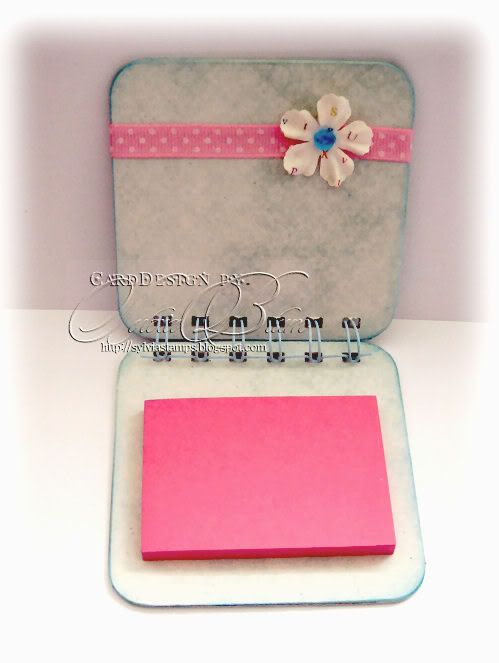
take a notepad, turn it over and put some double sided tape on it to glue it on the inside of the lower coaster
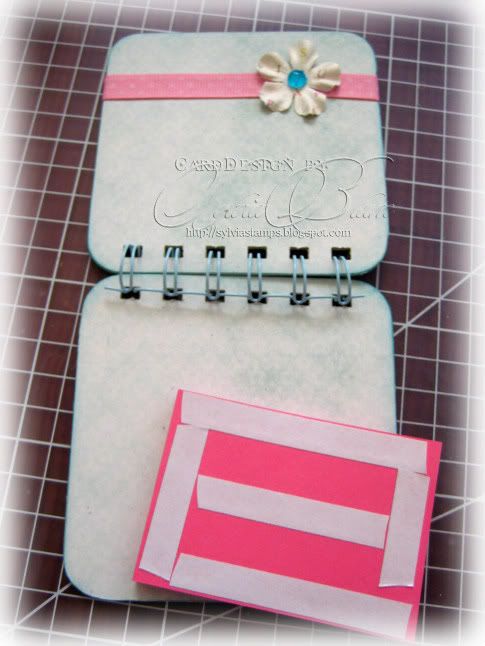
you're done! :)
(sorry for the bad photos.. it's raining cats and dogs here and I couldn't get better pictures.. maybe I will give this another try when the weather is better)
Hope you could follow this little instructions and I would appreciate it very much if you let me know if you tried this out :)
If you have any question about it, don't hesitate to ask me!!! :)
Ok.. let's get started:
The supplies we will need:
- 2 coasters (approx. 3 5/8 inch square)
- 2 different patterned papers 2 pieces of each pattern (=4 pieces of patternd paper) cut slightly larger than the coasters (I used papers from the May Grab at TDC designed by Amy Sumrall - not available at the moment)
- Zutter Bind-It-All
- binding wire (o-wire)
- sanding block
- glue (I used the Tombow glue roller, but double sided tape or any other glue will work, too)
- optional:
- some ink to ink the edges (Distress Broken China)
- some embellishments (like ribbon(Poppicrafts), flowers (Prima), brads e.g.)
Ok... onto step 1:
glue down one of the papers (I always begin with the inside) onto one coaster side and burnish it
step 2:
cut the overlapping edges (as shown on the photo below)
this is what it looks after cutting three edges (one edge left to cut):
step 3:
sand all around the edges
step 4 (optional):
ink the edges using a sponge (or leave it as is.. it's just that I have a thing with inking all edges *lol*)
step 5:
do the same with the opposite site (I used different papers for inside and outside, but you could use all the same papers if you like to):
step 6:
place the covered coaster into the Bind-It-All (upside down), center them and punch the holes (do this with both coasters)
step 7:
now you can embellish your coasters as you like.. I used some ribbon, paper flowers and dew drops here in this example
step 8:
now lay the two coasters on top of each other - you have to flip the front side and lay it under the back side to bind it, so you will have the 'seam' (where the open wire ends meet when they are punched together) in the inside when you are finished
step 9:
put both coasters with the o-wire upside down into the Bind-It-All and push
step 10:
take a notepad, turn it over and put some double sided tape on it to glue it on the inside of the lower coaster
you're done! :)
(sorry for the bad photos.. it's raining cats and dogs here and I couldn't get better pictures.. maybe I will give this another try when the weather is better)
Hope you could follow this little instructions and I would appreciate it very much if you let me know if you tried this out :)
~°~ Thanks for visiting my blog ~°~

Ein super WS, Dankeschön für Deine Mühe meine Liebe.
ReplyDeleteThis is gorgeous hun and the photos are just perfect, i have sunshine :)i will wish the sunshine your way Hugs Pops x x x
ReplyDeleteWhat beautiful Sylvia,l love the papers and colours.
ReplyDeleteHugs Riet.x
Wunderschön und lieben Dank für den WS.
ReplyDeleteLG
Anke
Sylvia, ein sußer süßes Büchlein und DANKE für den WS
ReplyDeleteOh my gosh that is so thorough and easy to follow! I cant wait to make one! Thank you for doing this!!!!!!!!!!
ReplyDeleteOh my Sylvia, love the tutorial, so glad that you created this for us. I can't wait to try this notepad booklet. It's just a neat idea esp for a coworker. Thank you!!!!!! Your notepad is so cute!!! Hugs to you. It's also raining here today!!
ReplyDeleteThis project is so cute!!!! Your tutorial is really great, thanks!
ReplyDelete