Hi everyone! I am thrilled that I was invited to write an article about stamping, on Lisa Rukin Swift's blog! Thank you so much for the invitation, Lisa!
If you know me, you know that I love pretty designer papers! But I also am a passionated stamper for a long time! I just LOVE stamping :)
So I thought for this special "stamping" feature, I will make a card without any patterned papers!
*gasp* ;-)
What do you think? Are you ready?
Ok, let's start:
)
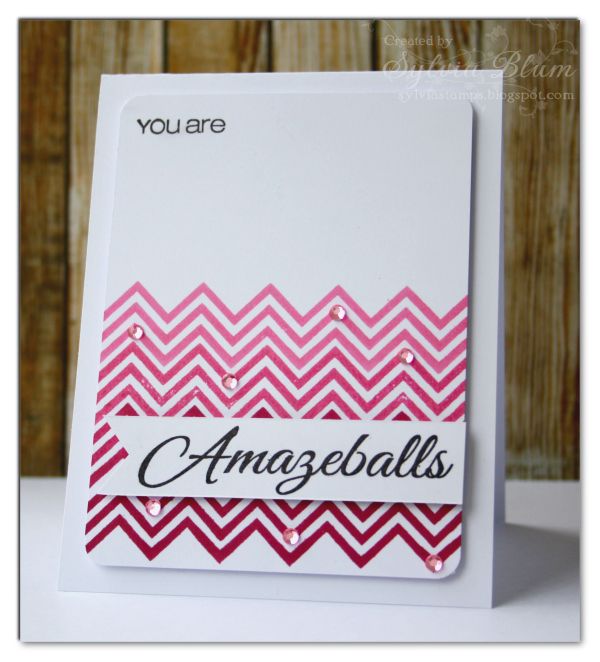
We are going to make the above shown card and create an "ombre" effect by using one background stamp and two inkpads!
I will show you how I did this and also share some general tips that I think are helpful to know when you are stamping.
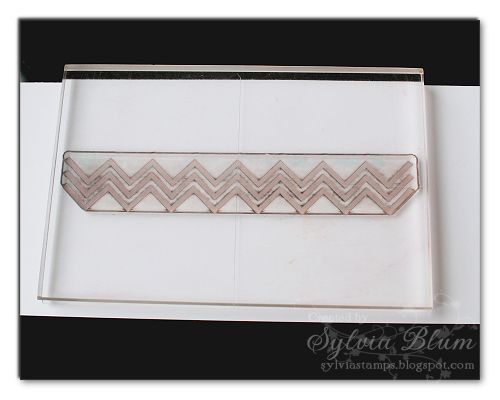
Here's tip #1 for using large clear stamps with acrylic blocks:
Instead of adhering the stamp onto an acrylic block, lay the stamp down onto the table (face down!) and make sure it lies straight. Then press down the acrylic block onto the back side of the clear stamp - as shown in the picture below.
This way you make sure to have your stamp attached straight to the block. If you do it the other way (press stamp onto acrylic block) it sometimes happens that the stamp is not straight on the block but is attached buckled or wavy.
To create the ombre background I used these two inkpads:
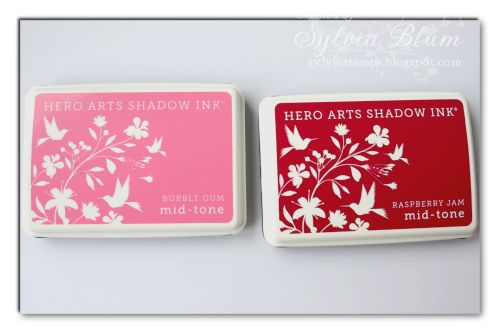
Hero Arts "Bubble Gum" is a light pink color and "Raspberry Jam" is a very rich and dark pink color.
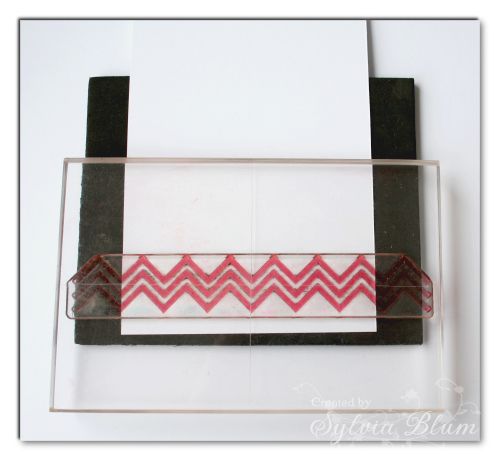
Before we start to create the ombre chevron pattern I want to share a second tip with you:
When stamping with a clear stamp, always put a soft and elastic pad (like a pc mouse pad) underneath your paper. This helps you to get a better and more crisp impression:
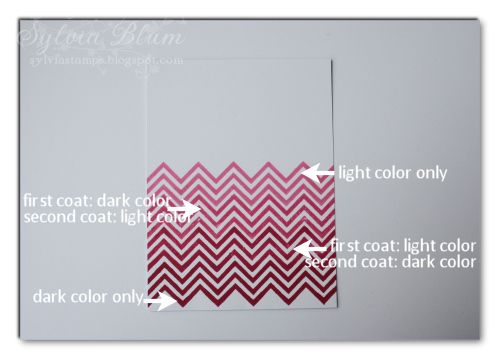
Now onto the ombre effect:
1. Ink the chevron stamp using the dark color and stamp it on the bottom of the white cardstock. Clean the stamp!
2. Ink the chevron stamp using the light color, then lightly dab the dark inkpad over it. Stamp above the first line of stamped chevron pattern. Clean the stamp!
3. Ink the chevron stamp using the dark color, then lightly dab the light inkpad over it (don't worry, the light colored inkpad will not be ruined! I am using this technique very often and never had any problems with my inkpads). Stamp above the second chevron line. Clean the stamp!
4. Ink the chevron stamp using the light color and stamp it above the third chevron line.
)
Isn't that easy?
I rounded all four corners of the stamped panel using the 1/4" corner of the Corner Chomper tool.
Afterwards I stamped "You are" with black ink in the left upper corner of the same panel and then I attached the panel to a slightly larger white cardbase using dimensional foam adhesive.
Stamp "Amazeballs" onto a strip of white cardstock using black ink and cut the left end of the strip so it looks like a little flag. Adhere to card using dimensional foam adhesive, again.
Now a little bling for some additional interest - and your stamped ombre card is finished!
Here's the finished card:

I hope you enjoyed this little article about stamping and maybe you learned something new and feel inspired to get your stamps out and have some FUN :)
Once again: Thanks so much for having me as a guest on your blog, Lisa!
Sylvia
***Thank you***

(see first post)

card recipe:
- stamps - Paper Smooches "Geo-graphic" (chevron); CAS-ual Fridays Stamps "Amazeballs" (words)
- inks - Hero Arts "Bubble Gum" + "Raspberry Jam"; Versafine "Onyx Black"
- others - white cardstock, We R Memory Keepers "Corner Chomper", pink rhinestones, dimensional foam adhesive
it is so beautiful sylvia
ReplyDeleteWow Sylvia - what a simple yet stunning creation! Thank you for showing all the details!
ReplyDeleteHugs,
Audrey
You are so creative, Sylvia! Congratulations....a well deserved honor!
ReplyDeleteGreat idea and lovely card! I really have to try this amazeballs technique! xxx
ReplyDeleteI totally adore this card & would never have done the ombre that way. Wonderful tutorial--thank you!
ReplyDelete