Showing posts with label fall. Show all posts

Thankful For You - Fall Card for CAS-ual Fridays #115


Hi everyone and happy Friday :-)
Hallo zusammen und Euch allen einen wunderschönen Freitag :-)
Is it Friday again? Yay...hooray!
This also means that it is time for another CAS-ual Fridays challenge! This weeks theme is
Ist es schon wieder Freitag? Tatsächlich...hurra! Und somit gibt es heute auch wieder eine neue CAS-ual Fridays Challenge! Das Thema dieser Woche lautet
create a clean and simple card or other project using fall colors and at least one leaf
zeigt uns ein "clean and simple" Werk in herbstlichen Farben und mit mindestens einem Blatt darauf
I kept my Fall card quite simple by using a piece of autumnal designer paper from Bo Bunny, a leaf and a sentiment stamp. I added some pearls to the paper and highlights to the stamped leafs using a white gel pen. That's it.
Ich habe meine Karte hier wirklich äußerst einfach gehalten, indem ich ein Stück herbstliches Designpaper von Bo Bunny, einen Blätter-und einen Sprüchesstempel benutzt habe. Dann noch ein paar Perlchen aufs Papier und die gestempelten Blätter noch mit weißem Gelstift aufgehübscht. Das war's auch schon.
To see what the super talented ladies from the CAS-ual Fridays design team came up with and to link up your projects, please visit the CAS-ual Fridays challenge blog  :)
Noch mehr Inspiration vom wirklich genialen CAS-ual Fridays Design Team und um Eure Werke zu verlinken, besucht bitte den CAS-ual Fridays challenge blog  :)


    Supplies
  • stamps - Paper Smooches: "Reflections"(leaf), CAS-ual Fridays Stamps: "Calm and Gentle" (sentiment)
  • patterned papers  Bo Bunny: "Forever Fall - Sunflower"
  • tools - WRMK Corner Chomper
  • others - white cardstock, Hero Arts inks "Field Greens" + "Soft Apricot", Bo Bunny Jewels


    Challenges

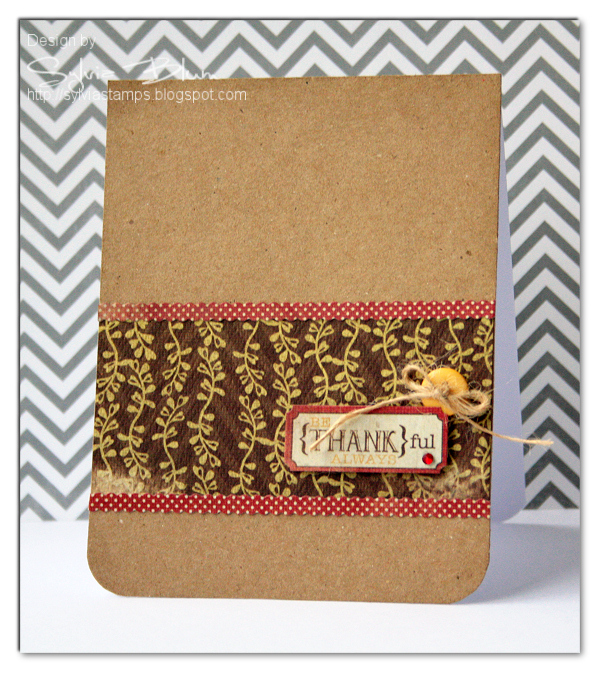
Be Thankful

Hi everyone and happy Saturday :-)
Today I have another non-stamped card for you ;-)
I've created this card for this weeks challenge at CAS-ual Fridays
 Besides using kraft cardstock, I've used patterned papers and some stickers from Authentique's "Thankful" collection.

Hallo zusammen und Euch allen einen wunderschönen Samstag :-)
Heute zeige ich Euch schon wieder eine nicht gestempelte Karte ;-)
Ich habe sie für die dieswöchentliche Challenge bei CAS-ual Fridays gemacht.
Ich habe für diese Karte neben Kraft Cardstock außerdem Papiere und Sticker von Authentique aus der Serie "Thankful" benutzt.

*** THANK YOU: this card was featured on the Authentique Blog ***

card recipe:

challenges:
  ~°~ Thanks for visiting my blog ~°~
Sylvia

Nutty For You


  Hi everyone and happy Saturday :)
Today I am sharing a card with you that I've created by following this weeks sketch from the CAS(e) this Sketch! challenge blog. I've used some of the pretty papers that will come with the Scrapbook Werkstatt November kit (available on Oct 26th). The stamps are from a set by Paper Smooches.
I also want to enter this card into this weeks challenge at CAS-ual Fridays where the theme is "over the edge"


Hallo zusammen und Euch allen einen wunderschönen Samstag :)
Heute zeige ich Euch eine Karte, die ich nach dem Sketch dieser Woche bei CAS(e) this Sketch! gemacht habe. Ich habe hierfür ein paar der hübschen Papierchen benutzt, die im Scrapbook Werkstatt November Kit enthalten sind (das ab 26. Oktober erhältlich sein wird!). Die Stempel sind aus einem Set von Paper Smooches. 
Außerdem möchte ich mit dieser Karte gerne an der CAS-ual Fridays Challenge teilnehmen, wo das Thema der Woche "over the edge" (also sowas wie "über den Rand hinaus") lautet.


card recipe:
challenges:
   
 ~°~ Thanks for visiting my blog ~°~
Sylvia

Love You To My Core


Hi everyone and happy Friday :)
TGIF and weekend is just around the corner!

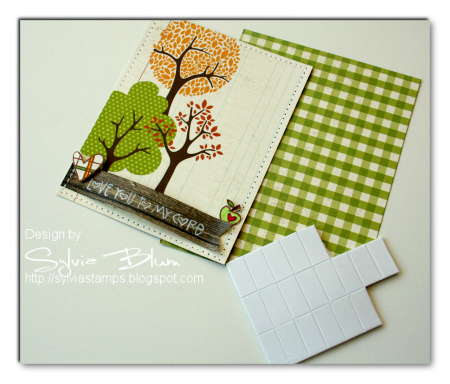
Today I want to show you a quick and simple card that I've created with the brand new
October kit from Scrapbook-Werkstatt. It will be available to order on September 26th (or you can also purchase a subscription for 6 or 12 months). 
Again, it's filled with a wonderful, huge assortment of papers and embellishments - love it!
Here's my card where I also used some more of my newly purchased Paper Smooches stamps. Can you tell, I truly adore their designs :)

Oh and with this simple card I wanted to share my creative process with you.. hope you enjoy (otherwise, just scroll down to see the result and ignore all the other pictures ;-) )


Hallo zusammen und Euch allen einen wunderschönen Freitag :)
Zum Glück ist endlich Freitag und das Wochenende steht vor der Tür!

Heute möchte ich Euch eine schnelle und einfache Karte zeigen, die ich mit dem brandneuen Oktober Kit der Scrapbook-Werkstatt gewerkelt habe. Es wird ab 26.September erhältlich sein (oder man kann es natürlich auch im 6- oder 12-Monats Abo bestellen, was den Vorteil hat, das man keines mehr verpasst und außerdem spart Ihr auch noch 5€ pro Monat bei Abschluss eines 12 Monats Abos - verglichen mit dem Kauf eines einzelnen Kits!) Und ich bin auch ganz sicher das Ihr dieses Kit hier nicht verpassen wollt! Es ist wieder mal gefüllt mit vielen super schönen Papieren und Embellishments - ich finde es wieder mal hinreißend!

Bei der Karte habe ich auch noch einmal ein paar meiner neu erstandenen Paper Smooches Stempel benutzt. Ich glaube man kann unschwer erkennen, das ich deren Designs wirklich sehr mag :)

 Ich wollte Euch außerdem mal anhand dieser einfachen Karte meinen kreativen Prozess zeigen - ich hoffe es macht Euch Spaß zuzusehen. Wenn nicht, dann ignoriert die vielen Bilder einfach und scrollt ganz zum Ende herunter um das Endergebnis zu sehen ;-) 

After choosing the papers I want to use, I cut out one of 4x6 journaling cards from the
Simple Stories "Harvest Lane - 4x6 Vertical Journaling Card Elements"  trimming down to approx. 4x5 inches
Nachdem ich die Papiere ausgewählt habe, die ich benutzen möchte, habe ich eine der 4x6 journaling Karten vom  Simple Stories "Harvest Lane - 4x6 Vertical Journaling Card Elements" Papier ausgeschnitten und es auf ca. 4x5 Inches zugeschnitten
 
I then cut out a base layer in standard card size (4.25x5.5) from  Simple Stories "Harvest Lane - Homespun" - I use the B-side for this
 Dann habe ich noch eine weitere Lage in (amerik.) Standardgröße (also 4,25 x 5,5 Inches) vom Simple Stories "Harvest Lane - Homespun" Papier (ich hab' hier die B-Seite benutzt) als Basis zugeschnitten
 
pierce holes for the faux stitching around the journal card, leaving the tree part unpierced
Löcher rings um die Journaling Karte gepiekt, wobei ich die Teile mit den Bäumen ausgelassen habe

then I used a white gel pen to create the faux stitching (I have various white gel pens and it depends on the papers I am using which one I choose.. here I am using the Inkssentials pen to create my faux stitching)
dann habe ich einen weißen Gelstift für das "falsche Nähen" benutzt (ich habe mehrere verschiedene weiße Gelstifte und es kommt immer ganz auf die Papiere drauf an, welchen ich wähle.. hier habe ich den Inkssentials Stift für meine falschen Nähte genommen)
 
after the 'sewing' was done, I gathered my stamping supplies and stamped with a frost white ColorBox ink on a scrap of patterned paper ( Simple Stories "Harvest Lane - Homespun" - A-side)
nachdem alles "genäht" war, habe ich meine Stempelsachen rausgekramt und mit einem ColorBox Stempelkissen auf einem Stück übrig gebliebenem Papier ( Simple Stories "Harvest Lane - Homespun" - A-Seite) gestempelt

but I really DON'T like the way the white ink stamped... way too light for my liking :-/
oh aber das gefällt mir wirklich GAR NICHT, wie das weiß gestempelte aussieht :-/ viel zu hell für meinen Geschmack

so I decided to trace the stamped sentiment with a white gel pen, so you can read it more easily
Yes, I admit, I don't like to do this, usually. But in this case I thought it would be better than the super light and hard to read stamped sentiment.. that's one of the reasons I don't use white ink often! If you have a tip on what ink leaves a great impression on dark backgrounds, please leave me a comment!!! thanks in advance :)  
also habe ich beschlossen, das ich den gestempelten Spruch noch mit einem weißen Gelstift nachziehe, so das man es besser lesen kann. Ja, ich gebe zu, das ich das normalerweise nicht so gerne mag und mache. Aber in diesem Fall dachte, das es um Längen besser ist als dieses kaum zu lesende und total helle Gestempel zu belassen... das ist übrigens einer der Gründe, warum ich nicht oft mit weißer Stempelfarbe stemple! Wenn jemand einen tollen Tipp für mich hat, welches weiße Stempelkissen einen wirklich guten Abdruck auf dunklem Papier hinterlässt, bitte hinterlasst mir doch einen Kommentar!!! Vielen Dank schon im Voraus dafür :)
 
now, some more stamping :)
I stamped the plaid heart and the cute apple with a heart from the Paper Smooches "Falling For You" stamp set on scraps of patterned papers
und weiter geht's mit mehr Stempeln :)
ich habe das Herz und das niedliche Äpfelchen mit Herzchen aus dem Paper Smooches "Falling For You" Stempel Set auf ein weiteres Stückchen übrig gebliebenes Papier gestempelt


after I colored the stamped heart and apple with Tombow Dual Brush pens real quickly and cut them out trimming closely, I cut the wooden patterned paper to create a little banner (just snipped a triangle at the right end of the rectangle)

then I layed down the stamped icons... thinking what looks best....
mmm... ok... but not good.. didn't like it that way...
nachdem ich das Herz und den Apfel mit Tombow Dual Brush pens wirklich ganz schnell coloriert und ausgeschnitten hatte, habe ich das "Holz"-Papier zu einem kleinen Banner geschnitten (einfach nur ein kleines Dreieck am rechten Ende des Rechtecks reingeschnitten) 
dann hab ich die ausgeschnittenen Stempelsymbole hingelegt... und mir überlegt was wohl am Besten aussieht
hmm... schon ok.. aber nicht wirklich gut.. gefällt mir nicht so recht...
better this way?
mmm.... no! 
so besser?
hmm... nein!
 but anyway.. onto the little banner: to give the whole thing more dimension I spreaded the little banner over the edge of my desk to break the fibres in the paper and to create a smooth curve. then I just put some dimensional foam adhesive on the center back of the banner and some adhesive tape on the left side
na egal... einfach mal weiter mit dem kleinen Banner: Um dem Ganzen ein wenig mehr Dimension zu verleihen habe ich das kleine Banner einfach über die Tischkante meines Basteltischs gezogen um die Fasern im Papier zu brechen und so eine schöne sanfte Kurve da rein zu bekommen. dann habe ich einfach in die Mitte der Rückseite ein 3D Klebepad gesetzt und an den Rand normales Klebeband zum befestigen
at the end I decided to put the heart on the left and the apple on the right side :)
then I just put the upper layer (the journal card layer) on more dimensional foam adhesive and adhered it to the green plaid base 
am Ende habe ich mich dafür entschieden das Herz auf die linke und das Äpfelchen auf die rechte Seite zu setzen. Dann hab' ich noch die Journaling Karte mit Hilfe von 3D Klebepads auf das karierte Papier geklebt
 to finish the card I only cut out a 4.25 x 11 inches white cardstock and folded it in half, then adhered the layers on top of it - that's it :)
ganz zum Schluss habe ich einfach ein Stück weißen Karton in der Größe 4,25 x 11 Inches zugeschnitten und in der Hälfte gefalzt und hab danach die Karte oben drauf geklebt - fertisch :)


the finished card:
die fertige Karte:

 close ups
und noch ein paar Nahaufnahmen


card recipe:


challenges:
Parties, I'm linking to:
Photobucketfive days five ways | feature friday free for all504 Main

 ~°~ Thanks for visiting my blog ~°~
Sylvia

Paper Pumpkins (w/tutorial)

Hi everyone and happy Wednesday :-)

I recently saw some fall decoration with pumpkins made of paper and I loved the idea.
So I tried to do some myself. These are really small (almost 2'' wide) but you can do them any size you want.
It all depends on the diameter of the circles you use for it (you also can use ovals to create the pumpkins.. I think this looks even more 'real' than the circles)


Ok.. I thought I'd put together a little tutorial on how to make these cuties.. they are really super easy and quick to make!


1 - punch (or die cut) 15-18 circles or ovals from plain orange or patterned papers
I only used 12 circles for these samples, but I think it would look even more nice with more circles or ovals
The circles can be any size (mine in this sample are 1.5'' inches)

2- fold the circles in half with patterns on the inside (refer to picture)

3 - put adhesive on one half of the outside of each circle (refer to picture - upper row)
 4 - glue the half circles all together side to side (except for the last one!) and this is what you have:


5 - roll a piece of rectangular brown or green paper to create the stem 


6 - put the rolled paper 'stem' in the center and glue the last circle halfs together


I know this little tutorial is anything but perfect but I hope you got the idea :-) It's really super easy!


card recipe:


  ~°~ Thanks for visiting my blog ~°~
Sylvia

Thankful for You - YNS Challenge #25


Good morning everyone! I'm so sorry, I'm a bad blogger lately. Only few creations and even less commenting *sigh* All I can say is 'sorry' and it's a super busy time at the moment.. but I hope to be back in full swing soon :D
Guten Morgen zusammen! Es tut mir so leid, das ich in letzter Zeit ein so schlechter Blogger bin. Nur ein paar wenige Karten und noch weniger Kommentare von mir *seufz* Ich kann einfach nur 'Entschuldigung' sagen und das es momentan wirklich super hektisch bei mir zugeht.. aber ich hoffe doch bald wieder so richtig zurück zu sein :D

Now onto my card for today: It's a card for the new YNS challenge. And not only this, but it's also my first time to be your hostess for the YNS challenge *woot woot*... I hope many of you will take part and join in the 'GIVE THANKS' fun :o)
Jetzt aber zu meiner Karte für heute: Es ist eine Karte für die neue YNS Herausforderung. Und nicht nur das, sondern es ist auch das erste Mal, das ich selbst die "Gastgeberin" für diese Herausforderung bei YNS bin *juhuuu*... ich hoffe also, das ganz viele von Euch teilnehmen werden und eine 'GIVE THANKS' (Karte für Thanksgiving oder eine Dankeschön Karte) basteln :o)


~°~ Thanks for visiting my blog ~°~

challenges:

card recipe:
  • stamp - Thankful For You Fhiona by Your Next Stamp
  • color medium - Tombow Dual Brush Pens, watercolor pencils, chalks
  • design papers, elements and alpha - Falling For Autumn by Connie Prince
  • other supplies - brown cardstock from stash, Nestabilities classic rectangle and classic circle dies, brown grosgrain ribbon from Poppicrafts, border punch by Martha Stewart, gold spiral embellishment from stash, pop dots from stash

Your Next Stamp 'Fall into Halloween' BLOG HOP

Welcome to the Your Next Stamp 'Fall into Halloween' BLOG HOP!  I'm sure you've guessed from the title that we're showcasing some fabulous new YNS Fall and Halloween stamps today! These new stamps are available to buy right now from the Your Next Stamp store along with all your YNS favourites.

Not only do we have a fantastic blog hop for you, but today is also the official start of the new YNS DT term and I'm super excited to be on the team for this current term! Today is also a YNS Challenge day too, so we've combining our hop creations with our YNS Challenge #24 creations!  [YNSC24 will run for 2 weeks as per usual (September 1-14) and although the DT have used Fall and Halloween stamps, the theme for this challenge is 'Anything Goes'.]

If you would like to participate in the hop and you didn't arrive here from Crystal's blog, please CLICK HERE to return to the start of the hop at the YNS Challenge blog, as you don't want to miss these fab new releases!
The hop starts today (Wednesday September 1st at 03:00 EST) and ends on Monday September 6th at midnight EST.

As always, here at Your Next Stamp, we have some wonderful prizes for you to win!  Two lucky winners will be drawn at random to each receive a new release stamp package, but please make sure you comment at every stop along the hop to be eligible to be entered into the draw.  We'd love you to join us over at our new Paper Craft Planet (PCP) Group, and so as an added incentive, anyone that becomes a member of our YNS PCP Group will automatically receive a second entry into the blog hop grand prize draw!  How great is that?  (It's free and easy to join PCP by the way!)

Not only is Karen offering two amazing prizes, she's also going to include a free surprise gift with every order placed at http://www.yournextstamp.com during the hop!  And that's not all ... if you join our YNS Group over at PCP, you'll also be personally emailed an exclusive PCP-YNS-Group-only YNS store discount code!

So onto my blog hop creations:

To create the first one -a Halloween bookmark- I have used EEK the Bat stamp


and here's a close up of the cute scary bat:


For the second one -a fall card-  I have used Acorn Fall Fun stamp


So now it's time for you to hop on over to the uber talented Simonne's blog as she is the next stop on our hop, but it would be great if you leave me a comment before you go :o)

Thanks so much for hopping with us today!  I hope you enjoy our new release and my creations :o)


~°~ Thanks for visiting my blog ~°~

challenges:

tag recipe:
  • stamp - EEK the Bat by Your Next Stamp
  • color medium - Tombow Dual Brush Pens, watercolor pencils, Sakura clear Stardust gel pen
  • design papers and elements - Jeepers Creepers by Chelle's Creations
  • other supplies - manila tag from stash, prima crystal swirls, Heidi Swapp Newsprint chipboard alpha, spiderweb ribbon from Poppicrafts, Adirondack inks in Butterscotch, pop dots from stash

card recipe:
  • stamp - Acorn Fall Fun by Your Next Stamp,
  • circle sentiment stamp from retired stamp set by Inque Boutique
  • color medium - Tombow Dual Brush Pens, watercolor pencils
  • design papers and elements - Golden Harvest by Danielle Engebretson and Mari Koegelenberg
  • other supplies - dark brown cardstock from stash, border punch by Fiskars, Nestabilities classic and scalloped circle large, wide moss green satin ribbon from Poppicrafts, Adirondack inks in Butterscotch, pop dots from stash